watercolor for cardmakers

Friday, December 2, 2011

You can use your cricut for a punched santa....


Cartridges used:  Accent Essentials, Plantin Schoolbook, E2 preloaded cartridge for leaf shape.
This was a toltal scraplift!!!  Did a few things different but with the help of this YouTube video

I of course added extra embellishment and used embossing folders to give santa some depth and textures and of course added his eyebrows!!!!  Go watch the video and give this card a whirl it was fun and quick and I think easy to make a batch for holiday giving!!!


Monday, November 21, 2011

Santa Slackers Week 3

Wow Christmas is creeping up on us fast!!!  Its Thanksgiving and time is limited but a slacker needs to keep on top of things and it was my week to post and pick a theme!!!  I figured ornaments would be an easy one,  and traditional is the way I went.  I dug out my ms around the page paper punches and embossing folders a little seem binding and some pearls.  The ornament I cut out with my slice but I know there are a few ornament cuts on my cricut but I wanted to try out the slice I bought and the christmas card disk I  bought on clearance although you are pretty limited to size you can cut your image up to four inches which is pretty perfect size for a card.  I cut my ornament out at 3" and it cut perfect.  The memory disk for this one is called noel and it does have a shadow and layer  capablility. 


I looked thru my stamps of christmas sentiments and kept with the colors on the card and stamped my image with Memento Bamboo Leaves.  Thanks for stopping by and come join in with us at  http://main.cricut.com/community/Cricut-Community_postst106053_Santa-Slacker-s-Week-3-Come-Play-Along.aspx !  A great group of ladies play along and all are welcome to get inspire and encouraged to post and inspire others!!!

Sandi (daveshunny)

Tuesday, November 15, 2011

Happy Birthday (to you)

I always put off making my birthday cards to the last minute and then I am pressed for time..  If I give one of my family a store bought card they sniff and say oh its not one you made?????  So I pulled out my SweetTreats cartridge and used one on my favorite cuts for a cupcake!!!  I used the Craftroom to weld the shadow feature of the cupcake to make it a shape card and then cut the other layers out of different papers from the Sweet Shoppe sStack  (aperage brand) I purchased a while ago at Tuesday Mornings.  The paper is a little thin so I cut two of each layer one out of the designer paper and one out of craft cardstock to give each layer some strength and depth. Used a punch for my tag and stamped the sentiment from Hampton Arts Cling Stamp set * Happy Birthday to you.  Used a little color string to tie on the tag and finished it off with faux stiching with my white jell pen!!! 

Very simple, but when you are looking for Quick it has to be simple right!!!  Oh and as you can tell I did do some inking with Tim Holtz distress inks....

Monday, November 14, 2011

Week 2 of Santa Slackers

I so need the nudge to get going on Christmas cards!!!  A few of us that frequent the Cricut message board are participating in a christmas card weekly challenge.  This is just for fun and for inspiration!!!  All are welcome to come and participate the more the merrier and we hope full of wonderful ideas!!!

Here is a link to the challenge:  http://main.cricut.com/community/Cricut-Community_postst104881_Santa-Slackers-Challenge---Week-2.aspx

This week we are using a reindeer as a focus and maybe a button or two  Here is my card that I made using Jolly holidays for my reindeer cut and the sentiment!!!  Now the little holly is from a new punch i purchased at m's (Martha Stewart)  and i also used some washi tape of Tim Holtz's!!! 

Very Traditional colors!!!  I think the reindeer on this cart is so darn cute and easy to put together!!!!  I want to encourage you all to keep working on your holiday projects and hope you join in and post some of the things you are making this holiday season!!!

Sandi (aka daveshunny)

Tuesday, November 8, 2011

Starting up Santa Slackers

Well its that time again and this year with the help of a few others we are starting up Santa Slackers for that little push we need to get our Christmas cards done ontime and a little inspiration!!!  I hope others come and play along on our weekly challenge as Christmas approaches over at the Pro Craft Community Card forum.  http://main.cricut.com/community/Cricut-Community_topics37_Cards.aspx

Here is my card for the forum this week.  We were suppose to use a tree somewhere on our card.  I used the Christmas tree as my focal point!!!!  I spend alot of time surfing thru wonderful videos others make on utube and someone made showed all how to make this christmas tree using the martha stewart punch that all have from a couple years back and winter frolic tree as a base.  It sure made it easy to make up for this A2 size card.  Did a little embellishing on my tree with some bling and pearls to spurce it up hahaha!!  Spruce tree get it!!!!  Also tried out a background stamp (working on my stamping technique and new christmas sentiment stamps!!!

Hope everyone joins us each week and lets us see and be inspired by your works of art!!!!  If not come on over and take a look and let us know what you all think!!!!

Sandi (daveshunny)

Sunday, November 6, 2011

Christmas underway****

Can you believe how fast Christmas is coming up on us!!!!!!  I know the stores have had xmas mdse out for a few weeks but they get earlier every year but I seem to get later doing the things to get ready for the holiday season.  I have my craft room moved but still need to do alot of organization to it.  Would help if i would quit buying things to fill it up!!!! 

Well i got up this am and decided to create!!!!  I pulled out the Jolly Holiday cart and a set of new xmas stamps I bought and this is what I came up with.  I also did a layer from Elegant Edges to add just a little to the card design (A2 size)  The tree (3.5in) and Bird (1.75) is from JH.  I used my stamp on the background and stamped on white and cut the penants for the sentiment.

This is the first time I have used my iphone to take a picture and I was pretty pleased with the clarity!!!  Of course my new room has plenty of light and I am sure that helped!!!!

Well thanks for stopping by and taking a look!!! I hope you will come back and see what else I will be working on for the next few weeks.  I really want to get back into the swing of things!!!


Sandi (daveshunny)

Saturday, October 1, 2011

Scoreboard meets Halloween.....

I was browsing thru You Tube like I always do and came across a video by Sarah Hamer.  She was making a wreath out of her Halloween papers that turned out so cute I had to give it a try.  Here is a link to the video that I used to make my wreath..http://www.youtube.com/watch?v=EdTbqvgZ4O8&feature=related
I did change it up a little by gathering some sheer fabric in back of the foam board circle i used and layered mine on top of each other a little more than she did.  I have a few friends that might like this so I plan on making a few more wreath as they go together quickly!!! 

Go watch maybe you to will make one of these up for Halloween!!!!

A Truckload of Birthday

It seems we have so many birthdays this fall but of course our little grandsons rates high on our list!!!
Dom just loves cars and trucks.  He spends hours playing with matchbox cars and all the different trucks and vehicles he has gotten over the past year!!!  I found the Cricut lite cartridge Beep Beep last week and thought this was perfect for my grandson.  I am sure to be using it alot.  I think I might try and make a mini album from it!!!  I know he will love it!!!  I hope he loves his card!!!!

Monday, September 26, 2011

A Daughter-in-Law and a friend....

It is my daughter-in-laws birthday today..... and i made this card using cloud 9 papers and the Elegant Edges Cartridge.  I have lots of mulberry flowers and decided to make a butterfly with the flowers as part of the wings. I strung some beads for the body and attached with Glossy Accents.  Ink,pop dots, and layers with a ribbon finished it off.... 


The finished card...

I so loved making this card and am quite pleased with how it turned out.  The Elegant Edges cart made this so easy!!!!

Monday, September 19, 2011

~~Too cute fo Spook~~~

Trying our the card feature on Mini Monsters and using my new Peachy Keen Stamps.... What a wonderful combo!!!!  I usually don't do much stamping but I dug into my halloween stamps and couldn't resist the spiders or the sentiment!!!
Thanks for Looking!!!!!


Papercutzchallenge #109

Seems like when I go to a challenge site it always inspires me to do a little designing...of course with the help of alot of others that are so inspiring!!!  I was on Cricut's Message boards scrolling thru the cards and LindaK from The Paper Boutique posted a wonderful Halloween card with a great video on making a simple pop-up card.  Go check it out!!!  I had seen that Paper Cutz Challenge had a card challenge using Ghostly things and the colors purple, orange, black, and white only this week.  So using the video on a pop--up card from Linda and the challenge this is what I came up with!!!  (i also used the make it yourself wobble with Linda has video instructions for so my little ghost woobles and that makes his eyes move too!!!

I used Cricut's Mini Monsters for my little ghostly guy and the phrase feature for the popped up Haunting on the insides.  Wanted to leave a blank space to add a message or a gift card for one of my many neices or nephews that I will be sending this to this halloween season!!!  Thanks for stopping and taking a look with what I hope to be the start of many more to come......

Friday, September 16, 2011

New technique tried....

After watching utube and seeing Sketch 1 of Raq's weekley card challenge on the Provo Craft messageboards I just had to try inking up a embossing folder to see if it had the look of the sketch.
I was impressed with how it defined the image more and gave the embossing a deeper looking image.  I used a new butterfly punch i bought recently.  I really have to stay out of the stores.  Seems like I am buying more than I am scrapping!!  Thanks for taking a look!!!

Sunday, September 11, 2011

New Cartridge/Challenge Entry


IMG_0524

I haven’t posted or made a new card is so long.  I have been busy working on a tag challenge (my first) and have neglected my cards.  On My Craft Spot, this week they are challenging all to make a project for a friend.  I just purchased a couple of the newer Cricut Lite cartridges with Bump in the Night being one of them.  Even though we are all a little different we have friends of all kinds.  These cute little monsters reminded me of that!!!  I have watched Utube , visited different sites trying to get motivated to make a card.  I am sure you will see other cards similar to mine but I changed it up and combined different things to get my card!!  A few embossing folders and some ink button and bows and I have a card to send to a friend!!  Hopefully this card has broken the ice on the freeze I have been in making cards!!!


Sandi (aka daveshunny)

Saturday, August 20, 2011

Another Damask decor card

I am so grateful that Provocrafts Craft Room as allowed me in on the Beta and let me play with their program.  I think they are on to a wonderful way to use the Imagine and the Expressions that the cartridge work the way they were promised at the Launches!!!!  Here is the second card I made using the Damask decor cartridge and the artwork from Yummy imagine cartridge.  I was able to size and fill my images to go together in the craft room which sure made picking some papers out easy!!!  The card was done in a A2 size and I added embelishments from my stash that most of us at some time or another have picked up for other projects.  M's has gotten alot of prima like flowers thru their Reflection line that I used and matched my paper choice perfectly.  The bow is made from a goodie Joy Sike sent me ... Love seam binding on cards. Thanks for stopping by and taking a look....


Sandi


Tuesday, August 16, 2011

Delight in the Little Things…

I know that it has been quite some time since I posted anything…..I have had my plate full… My mom went in the hospital for three weeks and returned home with a little more care than I anticipated.  With the cajoling of Joy Sikes I was able to make this card today.

Even though I haven’t been scrapping very much I have found the time to get a few new carts for myself.  Damask décor was used on so many pretty cards I had to have it and used it to make my card.  And imagine my surprise when I was able to get into the Cricut Craft Room and actually use it!!! I cut the card base and pumpkin out with it of course I had to run them through some embossing folders to give them some texture.  Now the little crow I cut using my imagine and the imagine more cartridge.  He is many layers cut at 3.3 and pop dotted and inked.  And yes I bought myself some white seam binding and inked it myself using Andirondak inks to match the color of my cards… a button and some pearls from my stash.
The sentiment is from the dollar bin at Michael’s.  I love the fonts on this series!!!  The papers are some I have had forever and from some of my scraps from other projects but seemed to work with the card. 
Hopefully I will be able to do more in the coming days because I am so much more relaxed and happy when I am working in my little room. Thankyou for stopping by and hey let me know you were here!!!!


Sunday, July 17, 2011

~~Ever thankful!~~~

Didn't have much time this past week to play......commitments elsewhere and heck-tick summer to blame.  I really enjoy doing challenges.  But so little time to play.  I know there was one that said use orange, green and white.  This stuck in my head.  There were some wonderful sketches on the cricut message boards this week and i used one of those to make up this card.  No cricut this week just my trusty cutter and Martha Stewart punches.  The bling is from M's in the dollar bin as well as the sentiment.  The stamp is so wistful don't you think......  I left my prima flower all naturelle and put a button I had purchased for Halloween in the center with a little memory string.  I tried and just let the paper do the work on this one instead of the cuts.  Hopefully I will get a little more done later this weekend but I hate to be inside when the weather just screams to be out of the house.......  Thanks for looking!!!

Tuesday, July 12, 2011

~~Surprise Surprise~~~

I am usually always lurking on the Cricut Card Message Board Forum.  It was the first place I visited when I started making cards and continue to do so when I need inspiration and ideas from.  Weekly there is a thread in the forum called Raq's Challenge that a wonderful group of ladies take turns posting sketches to inspire some wonderful cards.....  This week I used the second sketch .

This is my finished card that I made using Heidi Swapp papers I bought in a package at Tuesday Mornings when  I was visiting North Mrytle Beach this summer. 


I used the little mouse peeking out of the basket cut at 2.75 from Birthday bash.

And cut the mouse from Create a Critter at 3 inches for the inside of the card.  I love using embossing folders to give added interest to my papers. The sentiments are rub ons that I picked up a long time ago at Big Lots.  They are made by American Crafts.  The card is a A2 size card and many layers and popdots used with small touches of chalk ink  and pop dots for dimension also.

If you have the opportunity stop by the messageboards http://community.provocraft.com/Cricut-Community_postst83051_Raq-s-7-5-Challenge.aspx.  Check out all the wonderful work others do from the different sketches they put out their each week.  They are all truly inspiring!!!!!

Tuesday, July 5, 2011

Just another Birthday........ Revised

It seems like there is a never ending need for birthday cards all year round.  I made this one up using some pre-made die cuts from a pack of paper (from American traditional designs) called Celebrate.  Of course  FiFi is from Create a Critter.  I found her cute little sticker eyes at M's in the general craft area.  A little doodlin and stickles and a little Memory Thread to tie on the tag.  I used pop dots to give more depth to the little pooch and stamped the Happy Birthday on the card using Stayz on ink.  I think I would feel less pressure if I just made a birthday card a week then making them as I go....
Thanks for stopping by

Shame on me for not reading the rules for Birthday Sundaes Challenge .  I did make this card with them in mind.  Kristie reminded me that I had to link my blog entry to the site in order to qualify for the challenge.  Sorry Kristie I really needed to read your rules.  Hope I am not to late with this over-site on my part!!!!  Stop on by and see all the wonderful inspiration the site has to offer on staying on top of your birthday cards!!!!

Sunday, June 26, 2011

U are toad-ily awsome...

I have been searching thru my card magazines looking for ideas and inspiration to kick my act together in the creative department when I found an adorable frog card in Paper creation..magazine from July of 2009. (Yes i keep so many back issues of magazines).  The designer that I used to make this card was Cathy Schellenberg Toad-illy green article with many adorable frog cards!!!  Of course I used my cricut to make my frog.  He was cut at 3 inches from the Boys will Be Boys cartridge and the U was cut at 4" using the shift ARROW FONT on the same cartridge.  Now I have so many little embellishments stashed in this room that I pick up on a weekly basis that I cant remember where or when I got them but I am pretty sure on got the flowers from M.s and JoAnnes when on clearance.  This is how I have gotten a large amount of the supplies in my room.  The sentiment is computer generated using a new little font I picked up for free also.... Does anyone else have so many that it is hard to keep track of which ones you used on a particular card if you don't write it down. I do know that I used some chip board pieces that I picked up at big lots as the center of my flowers and the x & o made by basic grey.  Of course what would a card be without a little embossing.  The card turned out cute but I think it is a little busy!!!  Might try some different papers because I like the basic design of the card.....

  Thanks for stopping by and taking a look at my attempt to capture a toad-ily cool design.......


Sandi

Saturday, June 25, 2011

Lots of Anniversarys in JUNE

Seems like many of our friends are celebrating anniversary's this month!!  Luckly for me there are a few challenges going on that have inspired me to make a few much needed cards!!!  Fantabulous Challenge Me Monday  being one of them!!!  Okay i thought using a sun I can do that!!!  Well another couple who we golf with at least once a week celebrated their 44th anniversary and I thought well that is something to crow about right!!!  Just Because Cards has a fun crow on it that I thought would announce this remarkable accomplishment!!!  I also cut the sentiment out from this cart!!!  The rising sun is found on Country Life.  I did some embossing on both the rooster and the ground to give it some pop.  Did some layering with pop dots for depth also.  Inked up some of the edges with old paper distress inks.  and found some flocked brads and a acrylic sticker I had in my stash.  As usual I made this card as a 5 x 7 basically because i hate working tiny tiny!!!

Thanks for stopping by!!!  Let me know what you think!!!

Sandi (daveshunny)

Friday, June 24, 2011

Hip Hip Horay!!!!!!!!!!!!!!!!

I was feeling a little patriotic and had a birthday card to make for my Uncle whose birthday is on the Forth of July.  I love the silhouette cuts on A Child's Year and thought this one was so appropriate for his card.  He turns 82 on the 4th.  I also had picked up the Independence Day Cart last year and never used it so I thought the flog would be a good background layer for the festive little guy marching along in celebration!!!!  The card is a 5x7 inch with lots of layers and popping.  I did stickle all those little stars on the flag and it is hard to see how they sparkle on the picture.  The background paper was scanned into my computer and scaled down to size.  Now that I know I can do this I might not have to use up all my favorite paper.  I have a Epson Sylus Photo 1400 that does a fabulous job with printing.  I know this is cheating but I don't think I have very much room for more paper and it  turned out great!!!!    I used the stamped sentiments called celebration happiness by Hero Arts. 

Thanks once again for stopping by and taking a peek!!  I so enjoy when people stop by so let me know when you do!!!! 

Thursday, June 23, 2011

Two Pink Peas Blog Candy

Wow check this out!!!  What a lovely give away!!!  Who wouldn't love to get these goodies to play with!!!! Hop on over to her blog and see all that she has going on!!!http://twopinkpeas.blogspot.com/

Just a little beachy thankyou


We took another mini vacation (working one for my husband) and went to  North Myrtle Beach.  A very nice couple generously offered their condo on the ocean for us to use while we were there.  It was so much nicer than staying at a hotel!!!  I wanted to send them a little note to say how much we appreciated their generosity!!!

crabby thankyou 004

I used Life is a beach for my little crab and some Debbie Mumford paper that I have had like forever.  I put some googly eyes on the little guy that I got at M’s I just love the eyelids on these!!!  I used a little crinkle paper twine like ribbon to finish off the design.

My mind is still relaxing at the beach,  I sure need it to return so I can get back in the swing of being at home!!

Thanks for looking and stopping by and saying hello….Sandi

Sunday, June 12, 2011

A very special Anniversary

 Some very dear friends are celebrating their 55th wedding anniversary this week while we are on a trip with them to Mrytle Beach.  I wanted to make a very special card for them because they really are such a inspirational couple!!!  I have learned so much from them and can't figure out for me how they have been married this long and dont even look the age that they are married.
 I used the bloom cartridge to make the larger flowers and stuck a small flower from K and Company in the center and used Prima rosebuds also.  Tim Holtz tickets inked.  And a stamp image from Hampton Arts!!!  the bow is my attempt at using some old seam binding spritzed with some homemade glimmer mist!!!  Lots of layering on this one as well as distress ink!!!!
I finished off the insides with some stickers I had and computer generated what I want to tell them on their Special Day.  I only hope that I am still around to have  been married the numbers of years these two have been and that you can see the love between me and my husband as you can between the two of them!!! 
Thanks for looking and thank all of you for the contributions you have made to me to make this card!!!


Sandi

Thursday, June 9, 2011

For my hubby on Fathers Day


more fathersday hubby 001

There were a few challenges going on this week that I used to make this card for my hubby for Father’s day.

I used the card sketch from Paper Craft Star and the tie it up theme from My Craft Spot.  Both of these sites give such inspiration and do a little enabling too!!!

more fathersday hubby 002

I used my heritage cart to cut the auto out and ran thru my embosser.  And I bought some spellbinder dies so I could use my computer to print out my sentiments when I didn’t have quite the right stamps for my sentiments.  The metal gears are from my stash of embellishments I have been stocking up on and I used eyelets to run some cotton twine thru at the top of the card.  I have to say that every time I use a challenge to make a card I learn something new and enrich my knowledge in Card making!!! 

I hope you all stop by these challenge sites and take a look and have fun playing with paper!!!  Let me know what you think!!!

Tuesday, June 7, 2011

~~Bring on the Cake~~~ *Happy Day**

I know it has been a while since I have posted anything but my youngest granddaughter is turning four!!!
I can't believe it how is she that old when I haven't aged a bit!!!lol  With encouragement from my friend Joy I was able to get both of these two cards finished today!!

Happy Day
I made both of these cards using images from Simply charmed!!!  Those cute little smiles on the images of these two cartridges seemed so appropriate for the occassion!!!  And whats a card without a little popping . embossing, and stickles!!!!


Bring on the cake
I made the cake on this one from simply charmed but the wagon is from Just Because Cards!!  I dug into my stash for some flowers and buttons and found these puffy stickers I have had forever and used that for her name!!  Taylor loves to see her name on things!!  Much layering and punching done on this and of course a few brads on the wheels and stickles on the flames of the candle to give them a little flicker.  Because I put so much on this second card I had to make it a 5x7.  But the top one is a A2 size card.

Thanks for stopping by and taking a look!!  Be sure and leave a comment and say hi!!  I have missed everyone!!!

Monday, May 23, 2011

Hello, My friend.....I am back from a much needed vacation...

Well the road trip vacation is over and I sure wish it could of been longer!!!!  I did miss my scrap-room though!!!!!  My husband and I got in the car and drove from Johnstown PA to the first stop in Alabama and then a nite in Hattiesburg Mississippi.  Those were the stops we made before we headed to New Orleans for Four days.  My oh my what a city!!!  Lots of fun and pictures!!!  Then we hopped back in the car and headed to Panama City Beach were I got to finally Meet Joy Sikes from Purty Papers!!!  Joy and I have become great friends via Cricut Messageboards and aim chat!!  We both were suppose to meet up on Sunday for brunch before my hubby and I headed on over to Jacksonville Florida but, Joy surprised me and came a day early so we got to sit out at the bar area of the Holiday Inn Resort and have a few Margarita's for a few hours on the beach and then had dinner together with her wonderful hubby Dan and son and daughter-in law!!!!  Such wonderful people!!!
 Time was too too short with you Joy!!!!!!!  (  did get a much needed haircut when I got to Jacksonville!!!)

We were gone a total of two weeks finishing our travels visiting my friend since the fourth grade Marcia in Charlotte NC.  Good Times!!!!!

I think that I will need to take some time and get back into the swing of things but thought I would post this little card I made using Once upon a Princess in honor of keeping all that rain up in the north while I enjoyed all that wonderful sunshine down south!!!!

I bought myself a Sizzix Big Shot and love that it is more versitle with all the different embossing folders!!!!!

Now I just have to get busy with all these ideas floating around in my head!!!!

Thursday, April 28, 2011

To a very special MOM


to a special mom 2011-04-28 008

Only a few more to go!!!  I need lots of practice on using the sewing machine!!!  For some reason on paper I cant sew a straight line or get the paper to feed evenly on my machine.  You would think with the type of machine it is I wouldn’t have much problems!!  I will Have to make another because I am not quite satisfied!!! Not by a longshot!!!!! Once again the Bloom cartridge was used with K&Company paper.

Well I know what I will be doing!!!  Practice Practice Practice

Sandi

Wednesday, April 27, 2011

Happy Mom's Day

A few more cards to finish for Mothers Day and I am set to go!!!  I designed this one up using Bloom once again and did lots of layering and use the resin Boutique Fleurs from Reflections to embellish the bird cage.  The large butterfly is the cut that went along with the bird cage and Martha Stewart butterfly punch contributed to the smaller butterflies.  I so enjoyed this one!  The cuts were so easy and went together so well!!! 

I always welcome a quick hello from anyone that visits!!!  It is a way that helps me keep on the right track and gives me an opportunity to learn what others think.


Sandi

Tuesday, April 26, 2011

You’re the Best- Bloom

Well I almost had my post all done when the power went out here and it is not even storming yet!!!  Lost it all so lets try again!!!

mothers day bloom 2011-04-26 001

There are a few mother day challenges going on and I will be doing some traveling over the next few weeks and wont be able to scrap!!

Recipe:

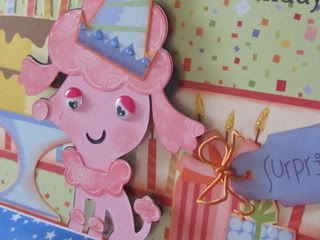
Cricut lite cartridge-bloom

Cuddlebug embossing folder dots

Making Memories- English Garden paper pack

Bazzill papers

Studio G’s Best Mom stamp set

Made this card from a frame that was on the bloom lite cartridge cut at 4 inches and used the paper and inked the edges to give it some depth!!  I love using ribbon on cards and this bow seemed to round out the design of the card!! 

*The butterfly is from a floral pick I tore apart and put on the card using glossy accents

OLYMPUS DIGITAL CAMERA

I hope to get a few more cards done before I leave and I am sure I will be stopping at LSS’s along the way and looking for treasures to use on my cards when I get home!!!

Thanks for stopping by!!!!!!!!!!!!
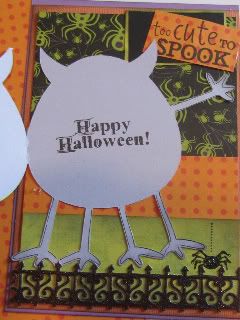
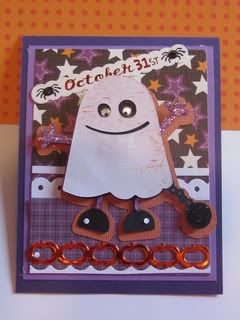
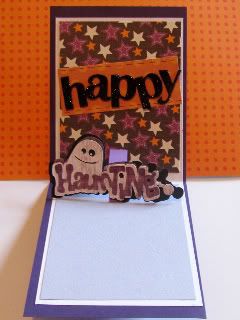